| 參數(shù) | 含義 |
|---|---|
| x1 | 弧的控制點的 x 坐標 |
| y1 | 弧的控制點的 y 坐標 |
| x2 | 弧的終點的 x 坐標 |
| y2 | 弧的終點的 y 坐標 |
| r | 弧的半徑 |
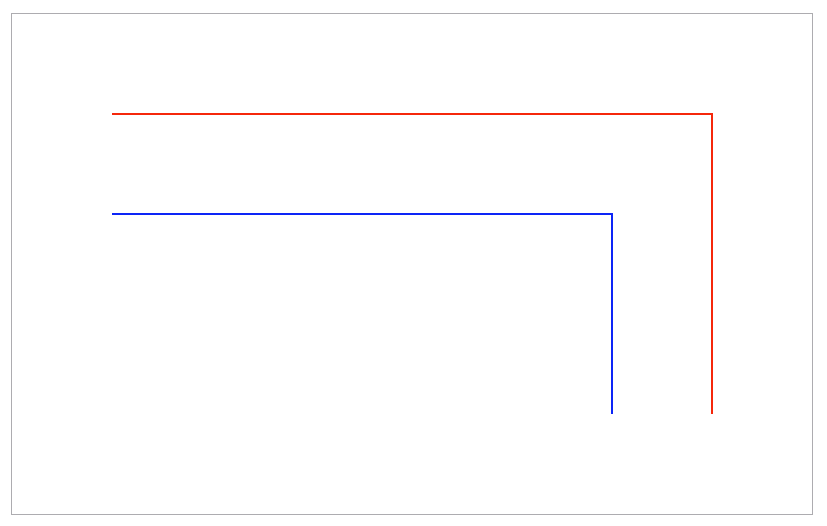
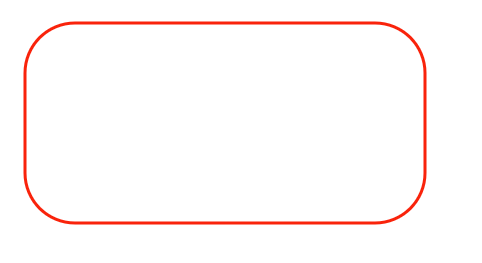
這里需要注意的是arcTo函數(shù)繪制的曲線的起始點需要通過moveTo()函數(shù)來設(shè)置,下面利用arcTo函數(shù)繪制一個圓角矩形:
function createRoundRect(context , x1 , y1 , width , height , radius)
    {
        // 移動到左上角
        context.moveTo(x1 + radius , y1);
        // 添加一條連接到右上角的線段
        context.lineTo(x1 + width - radius, y1);
        // 添加一段圓弧
        context.arcTo(x1 + width , y1, x1 + width, y1 + radius, radius);
        // 添加一條連接到右下角的線段
        context.lineTo(x1 + width, y1 + height - radius);
        // 添加一段圓弧
        context.arcTo(x1 + width, y1 + height , x1 + width - radius, y1 + height , radius);
        // 添加一條連接到左下角的線段
        context.lineTo(x1 + radius, y1 + height);
        // 添加一段圓弧
        context.arcTo(x1, y1 + height , x1 , y1 + height - radius , radius);
        // 添加一條連接到左上角的線段
        context.lineTo(x1 , y1 + radius);
        // 添加一段圓弧
        context.arcTo(x1 , y1 , x1 + radius , y1 , radius);
        context.closePath();
    }
    // 獲取canvas元素對應(yīng)的DOM對象
    var canvas = document.getElementById('mc');
    // 獲取在canvas上繪圖的CanvasRenderingContext2D對象
    var context = canvas.getContext('2d');
    context.lineWidth = 3;
    context.strokeStyle = "#F9230B";
    createRoundRect(context , 30 , 30 , 400 , 200 , 50);
    context.stroke();
效果如下:
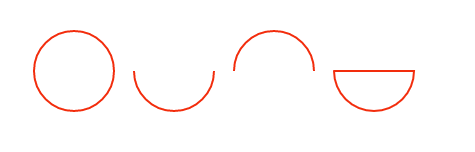
context.quadraticCurveTo(cpx,cpy,x,y);繪制二次貝塞曲線,參數(shù)含義如下:
| 參數(shù) | 含義 |
|---|---|
| cpx | 貝塞爾控制點的 x 坐標 |
| cpy | 貝塞爾控制點的 y 坐標 |
| x | 結(jié)束點的 x 坐標 |
| y | 結(jié)束點的 y 坐標 |
曲線的開始點是當前路徑中最后一個點。如果路徑不存在,那么請使用 beginPath() 和 moveTo() 方法來定義開始點。
context.bezierCurveTo(cp1x,cp1y,cp2x,cp2y,x,y); 繪制三次貝塞爾曲線,參數(shù)如下:
| 參數(shù) | 含義 |
|---|---|
| cp1x | 第一個貝塞爾控制點的 x 坐標 |
| cp1y | 第一個貝塞爾控制點的 y 坐標 |
| cp2x | 第二個貝塞爾控制點的 x 坐標 |
| cp2y | 第二個貝塞爾控制點的 y 坐標 |
| x | 結(jié)束點的 x 坐標 |
| y | 結(jié)束點的 y 坐標 |
文字渲染
與文本渲染有關(guān)的主要有三個屬性以及三個方法:
| 屬性 | 描述 |
|---|---|
| font | 設(shè)置或返回文本內(nèi)容的當前字體屬性 |
| textAlign | 設(shè)置或返回文本內(nèi)容的當前對齊方式 |
| textBaseline | 設(shè)置或返回在繪制文本時使用的當前文本基線 |
| 方法 | 描述 |
|---|---|
| fillText() | 在畫布上繪制”被填充的”文本 |
| strokeText() | 在畫布上繪制文本(無填充) |
| measureText() | 返回包含指定文本寬度的對象 |
上述的屬性和方法的基本用法如下:
var canvas = document.getElementById("canvas");
var context = canvas.getContext("2d");
context.font="bold 30px Arial"; //設(shè)置樣式
context.strokeStyle = "#1712F4";
context.strokeText("歡迎來到我的博客!",30,100);
context.font="bold 50px Arial";
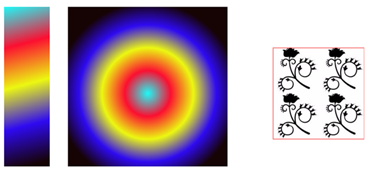
var grd = context.createLinearGradient( 30 , 200, 400 , 300 );//設(shè)置漸變填充樣式
grd.addColorStop(0,"#1EF9F7");
grd.addColorStop(0.25,"#FC0F31");
grd.addColorStop(0.5,"#ECF811");
grd.addColorStop(0.75,"#2F0AF1");
grd.addColorStop(1,"#160303");
context.fillStyle = grd;
context.fillText("歡迎來到我的博客!",30,200);
context.save();
context.moveTo(200,280);
context.lineTo(200,420);
context.stroke();
context.font="bold 20px Arial";
context.fillStyle = "#F80707";
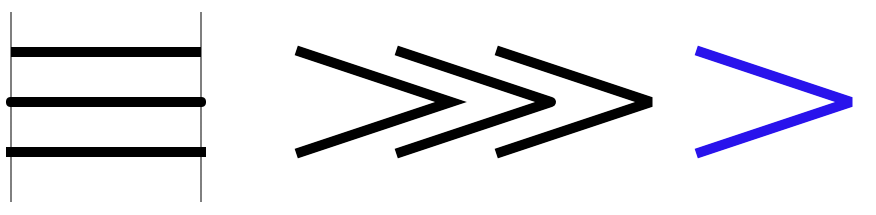
context.textAlign="left";
context.fillText("文本在指定的位置開始",200,300);
context.textAlign="center";
context.fillText("文本的中心被放置在指定的位置",200,350);
context.textAlign="right";
context.fillText("文本在指定的位置結(jié)束",200,400);
context.restore();
context.save();
context.moveTo(10,500);
context.lineTo(500,500);
context.stroke();
context.fillStyle="#F60D0D";
context.font="bold 20px Arial";
context.textBaseline="top";
context.fillText("指定位置在上面",10,500);
context.textBaseline="bottom";
context.fillText("指定位置在下面",150,500);
context.textBaseline="middle";
context.fillText("指定位置居中",300,500);
context.restore();
context.font="bold 40px Arial";
context.strokeStyle = "#16F643";
var text = "歡迎來到我的博客!";
context.strokeText("歡迎來到我的博客!",10,600);
context.strokeText("上面字符串的寬度為:"+context.measureText(text).width,10,650);
效果如下:

其他屬性和方法
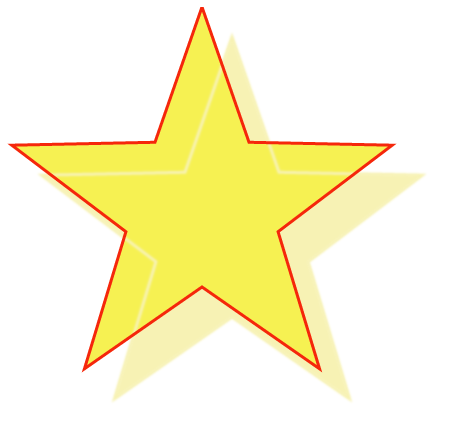
陰影繪制:
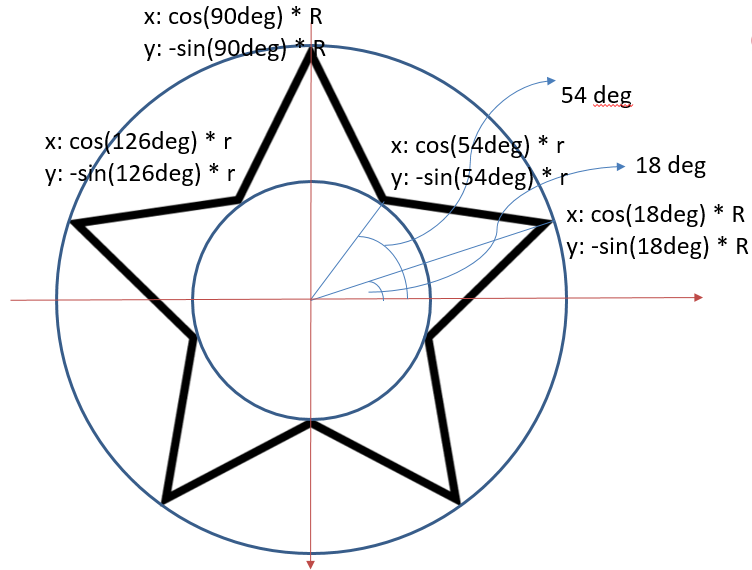
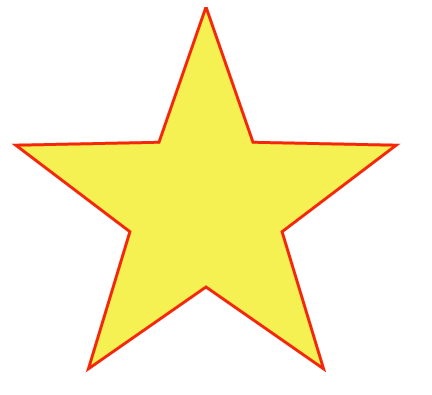
我們?yōu)橹袄L制的五角星添加一下陰影
var canvas = document.getElementById("canvas");
    var context = canvas.getContext("2d");
    context.beginPath();
    //設(shè)置是個頂點的坐標,根據(jù)頂點制定路徑
    for (var i = 0; i < 5; i++) {
        context.lineTo(Math.cos((18+i*72)/180*Math.PI)*200+200,
                        -Math.sin((18+i*72)/180*Math.PI)*200+200);
        context.lineTo(Math.cos((54+i*72)/180*Math.PI)*80+200,
                        -Math.sin((54+i*72)/180*Math.PI)*80+200);
    }
    context.closePath();
    //設(shè)置邊框樣式以及填充顏色
    context.lineWidth="3";
    context.fillStyle = "#F6F152";
    context.strokeStyle = "#F5270B";
    context.shadowColor = "#F7F2B4";
    context.shadowOffsetX = 30;
    context.shadowOffsetY = 30;
    context.shadowBlur = 2;
    context.fill();
    context.stroke();
效果如下:
圖形組合:
globalAlpha: 設(shè)置或返回繪圖的當前 alpha 或透明值
該方法主要是設(shè)置圖形的透明度,這里就不具體介紹。
globalCompositeOperation: 設(shè)置或返回新圖像如何繪制到已有的圖像上,該方法有以下屬性值:
| 值 | 描述 |
|---|---|
| source-over | 在目標圖像上顯示源圖像(默認) |
| source-atop | 在目標圖像頂部顯示源圖像。源圖像位于目標圖像之外的部分是不可見的 |
| source-in | 在目標圖像中顯示源圖像。只有目標圖像之內(nèi)的源圖像部分會顯示,目標圖像是透明的 |
| source-out | 在目標圖像之外顯示源圖像。只有目標圖像之外的源圖像部分會顯示,目標圖像是透明的 |
| destination-over | 在源圖像上顯示目標圖像 |
| destination-atop | 在源圖像頂部顯示目標圖像。目標圖像位于源圖像之外的部分是不可見的 |
| destination-in | 在源圖像中顯示目標圖像。只有源圖像之內(nèi)的目標圖像部分會被顯示,源圖像是透明的 |
| destination-out | 在源圖像之外顯示目標圖像。只有源圖像之外的目標圖像部分會被顯示,源圖像是透明的 |
| lighter | 顯示源圖像 + 目標圖像 |
| copy | 顯示源圖像。忽略目標圖像 |
| xor | 使用異或操作對源圖像與目標圖像進行組合 |
下面是一個小示例,可以通過點擊改變組合效果:
<!DOCTYPE html>
<html lang="en">
<head>
<meta charset="UTF-8">
<title>圖形組合</title>
<style type="text/css">
#canvas{
border: 1px solid #1C0EFA;
display: block;
margin: 20px auto;
}
#buttons{
width: 1000px;
margin: 5px auto;
clear:both;
}
#buttons a{
font-size: 18px;
display: block;
float: left;
margin-left: 20px;
}
</style>
</head>
<body>
<canvas id="canvas" width="1000" height="800">
你的瀏覽器還不支持canvas
</canvas>
<div id="buttons">
<a href="#">source-over</a>
<a href="#">source-atop</a>
<a href="#">source-in</a>
<a href="#">source-out</a>
<a href="#">destination-over</a>
<a href="#">destination-atop</a>
<a href="#">destination-in</a>
<a href="#">destination-out</a>
<a href="#">lighter</a>
<a href="#">copy</a>
<a href="#">xor</a>
</div>
</body>
<script type="text/javascript">
window.onload = function(){
draw("source-over");
var buttons = document.getElementById("buttons").getElementsByTagName("a");
for (var i = 0; i < buttons.length; i++) {
buttons[i].onclick = function(){
draw(this.text);
return false;
};
}
};
function draw(compositeStyle){
var canvas = document.getElementById("canvas");
var context = canvas.getContext("2d");
context.clearRect(0, 0, canvas.width, canvas.height);
//draw title
context.font = "bold 40px Arial";
context.textAlign = "center";
context.textBasedline = "middle";
context.fillStyle = "#150E0E";
context.fillText("globalCompositeOperation = "+compositeStyle, canvas.width/2, 60);
//draw a rect
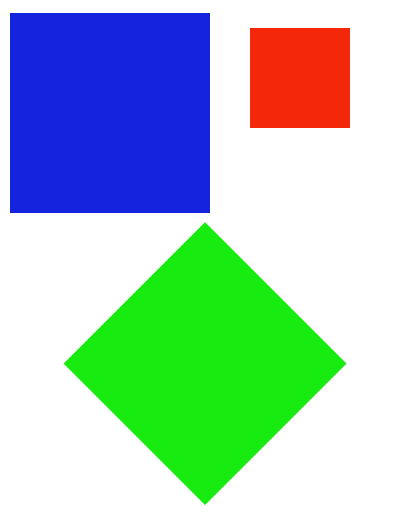
context.fillStyle = "#F6082A";
context.fillRect(300, 150, 500, 500);
//draw a triangle
context.globalCompositeOperation = compositeStyle;
context.fillStyle = "#1611F5";
context.beginPath();
context.moveTo(700, 250);
context.lineTo(1000,750);
context.lineTo(400, 750);
context.closePath();
context.fill();
}
</script>
</html>
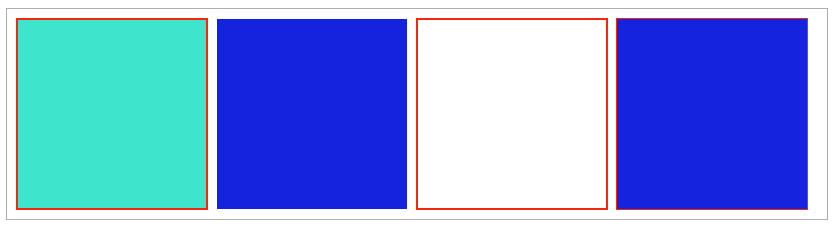
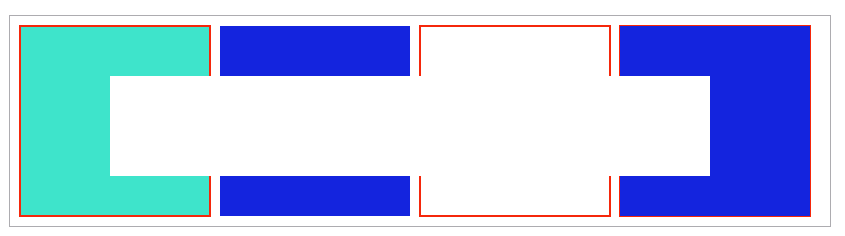
讀者可以點擊標簽來觀察不同的組合效果,效果如下:

剪輯區(qū)域:
clip()方法從原始畫布中剪切任意形狀和尺寸。
提示:一旦剪切了某個區(qū)域,則所有之后的繪圖都會被限制在被剪切的區(qū)域內(nèi)(不能訪問畫布上的其他區(qū)域)。您也可以在使用 clip() 方法前通過使用 save() 方法對當前畫布區(qū)域進行保存,并在以后的任意時間對其進行恢復(fù)(通過 restore() 方法)
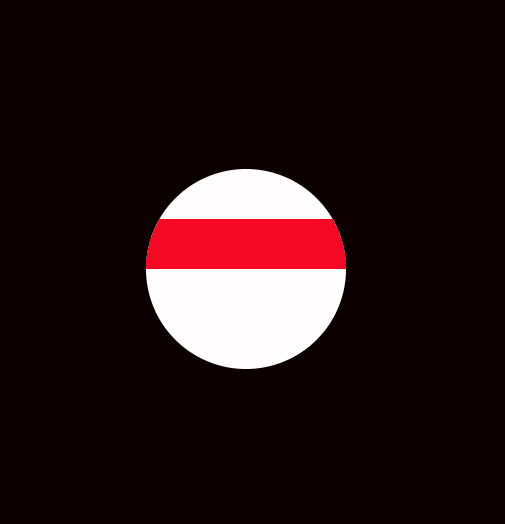
以下是用一個圓去截取一個矩形的示例:
var canvas = document.getElementById("canvas");
    var context = canvas.getContext("2d");

    context.beginPath();
    context.fillStyle = "#0C0101";
    context.fillRect(0,0,canvas.width,canvas.height);

    context.beginPath();
    context.fillStyle = "#FFFDFD";
    context.arc(400,400,100,0,2*Math.PI);
    context.fill();
    context.clip();

    context.beginPath();
    context.fillStyle = "#F60825";
    context.fillRect(200, 350, 400,50);
除了上述的屬性的和方法,還有以下等方法:
drawImage(): 向畫布上繪制圖像、畫布或視頻。
toDataURL() :保存圖形
isPointInPath(): 如果指定的點位于當前路徑中,則返回 true,否則返回 false。
這里就不逐個舉例說明了。
以上就是本文的全部內(nèi)容,希望對大家的學(xué)習(xí)有所幫助,也希望大家多多支持腳本之家。
標簽:惠州 蘇州 咸陽 營口 萍鄉(xiāng) 甘南 紅河 文山
巨人網(wǎng)絡(luò)通訊聲明:本文標題《詳解HTML5 canvas繪圖基本使用方法》,本文關(guān)鍵詞 詳解,HTML5,canvas,繪圖,基本,;如發(fā)現(xiàn)本文內(nèi)容存在版權(quán)問題,煩請?zhí)峁┫嚓P(guān)信息告之我們,我們將及時溝通與處理。本站內(nèi)容系統(tǒng)采集于網(wǎng)絡(luò),涉及言論、版權(quán)與本站無關(guān)。